Follow the given steps to Tour of Canvas PowerApps Dashboard Overview
Step1:-
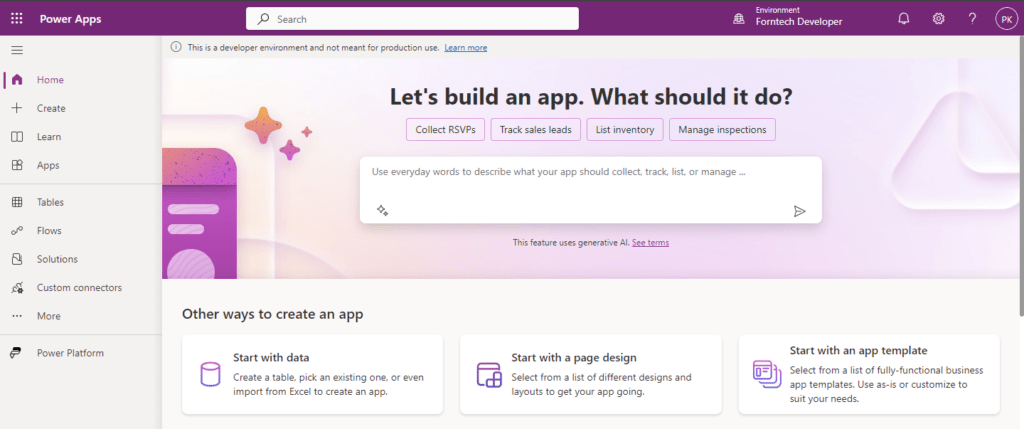
Begin by accessing the Power Apps platform at https://make.powerapps.com/ and authenticate using your provided credentials.
Step2:-
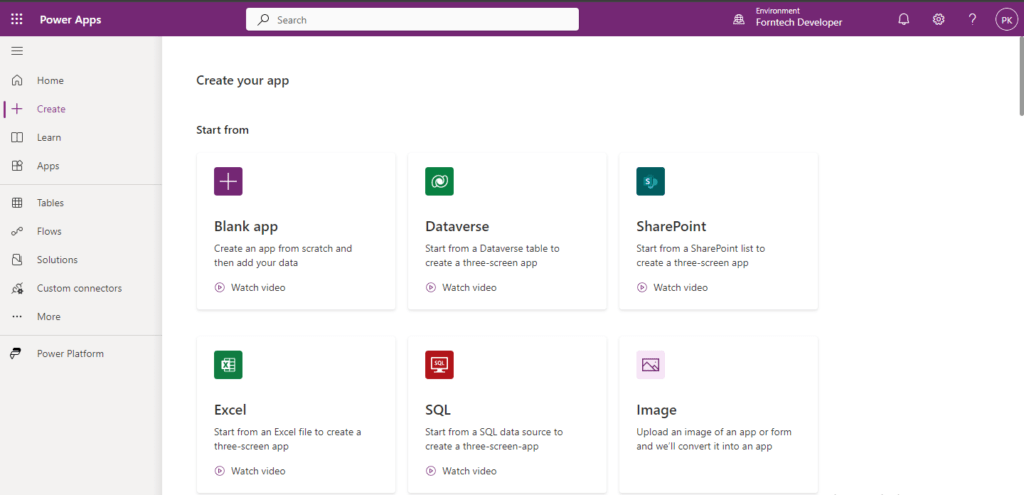
Upon successful login, navigate to the “Create” option and select “Blank App” from the available choices.
Step3:-
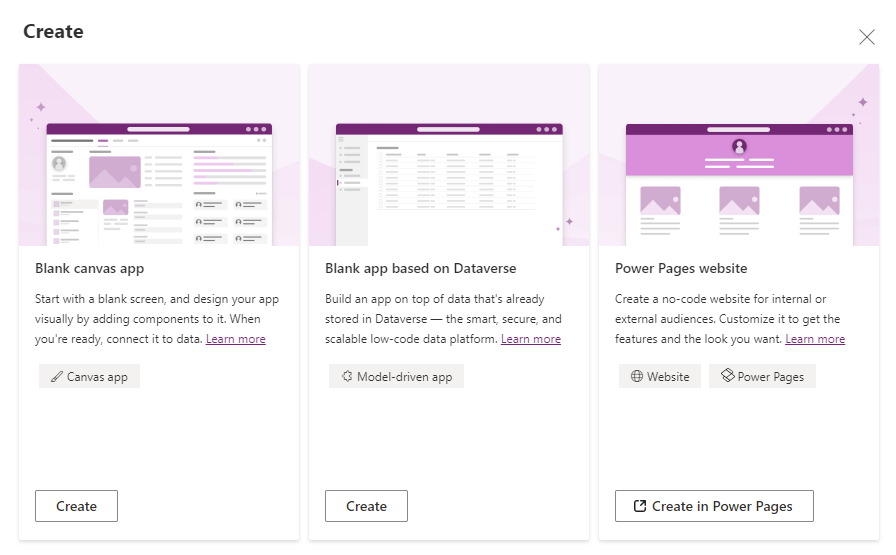
Select an option for the creation of a “Blank canvas app“, then proceed by clicking the “Create” button to initiate the process.
Step4:-
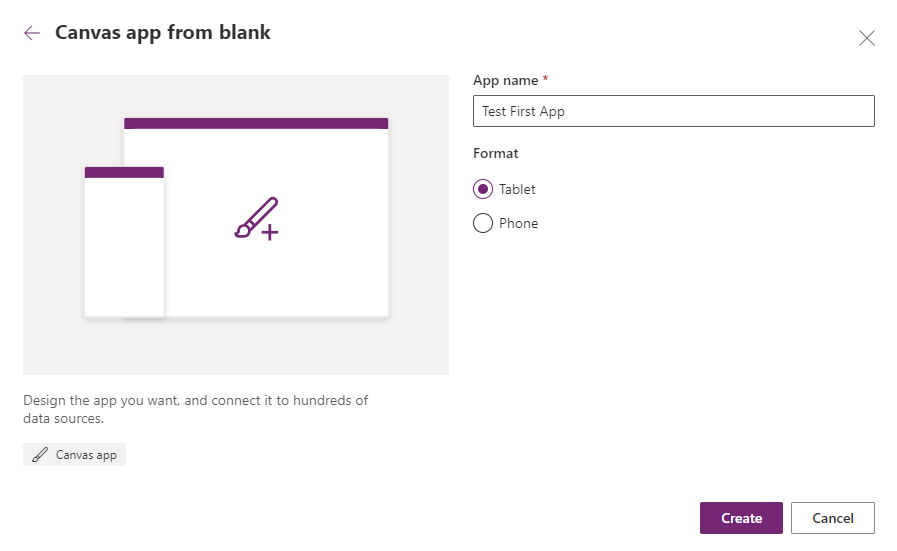
You will be prompted to specify your desired “App Name” and select the preferred format for your application, either Phone or Tablet. Confirm your selections by clicking the “Create” button.
Step5:-
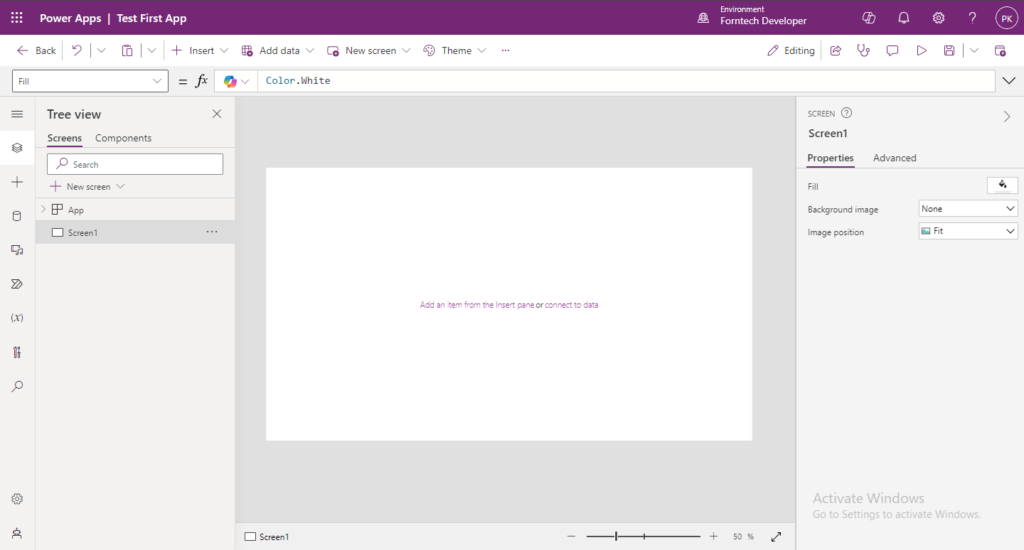
Upon completion, you will be directed to the main dashboard, where you can develop and test your application.
Step6:-
Access the Top Bar Ribbon, where most of the app controls are conveniently located.

Step7:-
Utilize the Right Sidebar to edit properties of controls such as fonts, colors, font sizes, padding, margins, and positional coordinates (X, Y-positions), among others.

Step8:-
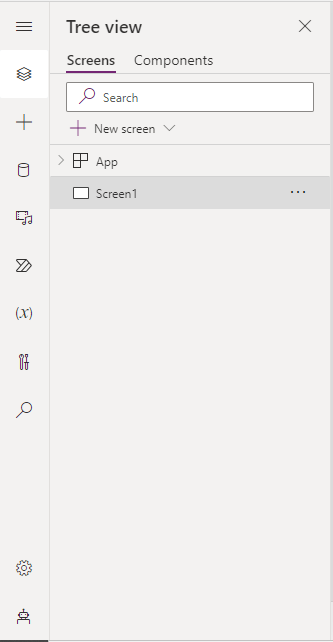
Explore the Left Sidebar for additional features complementing the Top Ribbon Bar, including the Tree View, Media options, variables, and more.
Step9:-
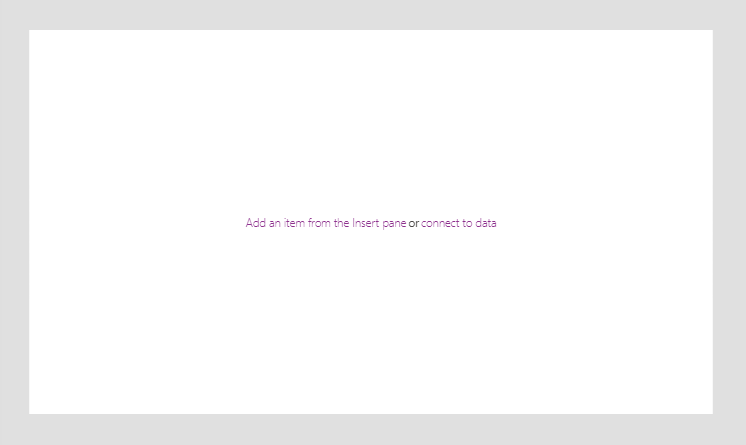
The canvas area is your primary workspace, where you will be designing and building your application.
Step10:-
Utilize the Bottom Bar to navigate between screens, and adjust the canvas size as needed for your workspace.

Conclusion
This guide provides a step-by-step process for creating a blank canvas app in Power Apps. It starts with logging into the platform, selecting the “Create” option, and choosing a blank app. Users then specify the app’s name and format (Phone or Tablet) before being directed to the main dashboard. Key components of the interface, such as the Top Bar Ribbon, Right Sidebar, Left Sidebar, canvas workspace, and Bottom Bar, are outlined, highlighting their functions and how they aid in the app development process.